Wednesday, March 25, 2009

Sparkle Sparkle!

You know me...i love adding glitters to my cards…actually, to anything! Whether adding sparkly stickers or using glitter glue, it will always add a little dazzle.
Here are some ways to sparkle ‘em cards:

  1. Sparkly Paper.The Glitter Stack comes with different colours and lots of sheets- all sparkling with glitter! The cards are acid-free and thick with a textured surface...perfect for cutting or tearing!

    The All Occasion Glitter Stack
    All Occasion Glitter Stack
    From Michaels Craft Store.

    - Comes with 21 designs and 42 sheets
    - 8x8 cards with an assortment of prints in stripes, polka dots, flowers, and more!


    Solid Glitter Stack
    Solid Glitter Stack
    From Michaels Craft Store.

    - Comes with 12 glittery colours and 30 sheets (12x12)


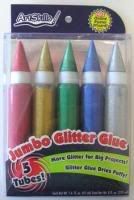
  2. Glitter Glue. Glitter Glue is the best way to personalize everything! It dries puffy to add extra dimension and texture. If you’re messy like me, make sure you buy washable glitter glue.

    Glitter Glue
    From Michaels Craft Store.

  3. Shimmer Stickers. I saved the best one until the end =) You can also add dimension and texture to your cards and other decorating projects with colourful, sparkly stickers. Ohhh, there are so many different types of stickers to choose from! I have a box full of stickers! :) ...the one on the right is sooo cute! lol


    Left: Michaels Craft Store.
    Right: Flicker--Uploaded by [RUNMIARUN].

sureL's tips and techniques.


♥Here's a way to add some sparkle to plain and simple stickers:
Use a glitter glue and start decorating!

Here's your chance to be creative! :)


PS: I'm changing my layout...slowly ♥

Saturday, March 14, 2009

saving the world, one rubber stamp at a time!

...well, not really. but rubber stamps will sure save me A LOT of time.

Rubber stamps come in all different sizes and cute designs! By using simple stamping techniques, you can add beautiful pictures on your handmade cards! And here’s the best part: since there are sooooo many designs, you can still be creative and go buck wild.

Michaels Craft Store
I really like this card!
From Michaels Craft Store.

I'm hoping my cards will look something like this one. It's so simple, yet very cute!... but if it was me, I would add some glitter here and there, but that's okay! haha =P


Oh, I just got the best deal! I bought a set that included 53 clear stamps, 2 stamp blocks, 3 ink pads, and 8 cards with envelopes for…wait for it…for only $4.94CDN!!! it was about $10CDN. Don’t you just love it when your item is marked original price, but then your cashier tells you that your item is on sale??? I wanted to droooooool. haha

My First Stamp Collection =)

My First Stamp Collection =)


sureL's tips and techniques.
♥ Look for unmounted stamps (rubber only) that can be used with stamp blocks or acrylic blocks. That way, you can save a lot space. Check out a video of how pinkcatstudio demonstrated 3 clever ways to store unmounted rubber stamps.


Michaels Craft Store
From Michaels Craft Store.


♥ If this is your first time purchasing rubber stamps, figure out what style you like. Do you like fancy designs? Flowers? Letters and Phrases? Or even better, you can buy themed stamps…that way, you can keep your designs consistent. But you don’t have to limit yourself to buying themed stamps…you can always mix and match!

Michaels Craft Store
From Michaels Craft Store.


happy stamping! :)

Thursday, March 5, 2009

after midterm exams

I haven’t made a card for the longest time…all thanks to school! I kinda went buck wild after I finished my last midterm…I stayed up until 4am making cards. Anyways, I hope I can buy a better camera this year. This camera doesn't capture the sparkle-ness on the cards! lol …enjoy!

Window-shaped Card
This is an example of a window-shaped card.

♥Card is 25cm x 12.5cm
♥Window is 8cm x 8cm
♥Cut four strips of paper (1.5cm x 10cm) with decorative-edge scissors
♥Attach paper to the inside of the card (in this case, I used a green paper)
♥Start decorating!

This idea was taken from "The Art of Card Making" by Claire Sun-ok Choi, et. al.

An Egg Yoke?
This card wins the award of the fastest card to make! It took me only 30mins to make! Well, nothing to be proud of because my cousin didn't know what that "yellow thing" was and little brother thought it was an egg yoke. Anyways, I don't really need to explain how to make this one...kinda simple. Oh, it's supposed to be a sun. lol


Flower Pot
I hope she's not reading this right now because I didn't give it to her yet. She's in Taiwan right now and I miss her a lot =(
I went overboard with the sparkly red flowers, but I can't help it...they're so shiny! =)

♥Card is 25cm x 14.5cm
♥Pot: Use paper with cute patterns on it. Top pot is 9.5cm x 2cm. I guessed the bottom part of the pot =)
♥Cut out a heart. And, using a different colour paper, use a decorative-edge scissors to cut out a heart
♥Add green leaf and stem

sureL's tips and techniques.

The Perfect Fold
To get the perfect fold, don't just fold your card in half. Use the other side of an exacto/x-acto knife or a craft knife. This will create a neat crease where you can easily fold your card.

♥use a ruler!

♥remember: don't use the sharp side! you don't want to cut your card in half!

ShareThis

Related Posts Plugin for WordPress, Blogger...

Free Blog Counter